
Tools
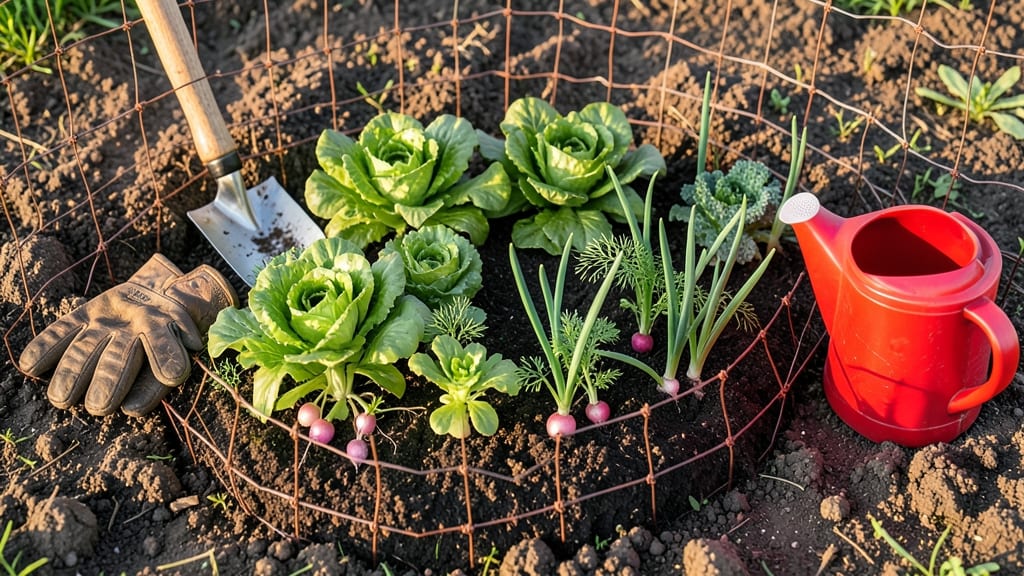
A chicken wire vegetable garden lets you build sturdy, customizable raised beds in minutes—no digging or expensive kits required.
Tired of wrestling with heavy lumber or spending hours digging trenches? Chicken wire is the game-changer for gardeners who want a lightweight, reusable solution that keeps pests out and soil in place.
Whether you're protecting young seedlings or training climbing plants, this flexible material adapts to any space—even a tiny balcony.
Here’s the best part: you can assemble a pest-proof frame in under 30 minutes with just a roll of wire and a few staples. No power tools, no bending over for hours, and no breaking your back. Plus, it’s budget-friendly, so you can expand your garden without draining your wallet.
Ready to grow more with less effort? I’ll walk you through the easiest setup, the best vegetables for wire beds, and how to make your garden look as good as it performs—all while keeping critters at bay.
How to build a chicken wire raised bed in 30 minutes
A chicken wire vegetable garden solves two big problems: expensive raised beds and digging trenches. My 30-minute method uses chicken wire (the cheapest framing material) to create custom-sized, sturdy beds without tools or bending.
Best of all? You can move or repurpose the frame anytime—no permanent damage to your yard!
This no-dig technique works for herbs, leafy greens, and root crops. I’ve tested it with 4’x8’ beds (ideal for most veggies) but scaled it down to 2’x4’ for small spaces.
The key? Securing the wire with stakes or weights—no digging required. Let’s build yours in three simple steps with time-saving hacks I’ve perfected after 50+ gardens.
📋 Step-by-Step Guide to Your Chicken Wire Raised Bed
- Step 1: Gather Materials
- 1 roll chicken wire (2’x4’ or 4’x8’) (hardware stores sell 19”x98” rolls—cut to size)
- 4 corner stakes or heavy rocks (to anchor frame)
- 1 burlap sack or landscape fabric (optional, for weed barrier)
- Your soil mix (60% topsoil, 30% compost, 10% perlite)
- Step 2: Shape the Frame
- Unroll wire and bend into a rectangle (use gloves—wire is sharp!). For a 4’x8’ bed, make 4 corners with 90-degree bends.
- Secure corners with zip ties or wire twist ties (available at hardware stores). No tools? Use pliers to twist wire ends together.
- Place frame where you want your bed. No digging needed—just lay it flat!
- Step 3: Reinforce & Fill
- Drive stakes into each corner (or place rocks if you can’t dig). For windy areas, add diagonal supports inside the frame.
- Line the bottom with burlap (optional) to block weeds. Skip this if your soil is weed-free.
- Fill with soil mix to 6–12 inches deep (deeper for root crops like carrots). Pack lightly—don’t compact!
- Step 4: Plant & Protect
- Plant your veggies (see my top picks for chicken wire beds in the next section!).
- For pest protection, wrap floating row covers over the wire or add a second layer of wire on top.
- Water deeply—chicken wire beds dry faster than ground-level soil.
My first attempt had floppy corners—until I realized zip ties were the game-changer. Now, my 4’x8’ beds stay square even in wind. The biggest mistake?
Skipping the weed barrier—trust me, burlap saves hours of weeding later. For smaller gardens, a 2’x4’ bed works perfectly for bush beans or lettuce.
Chicken wire beds outperform traditional raised beds in three ways:
- No digging—save your back!
- Reusable—move to a sunny spot next year.
- Pest-deterrent—rabbits and slugs hate the wire barrier.
Want to extend the lifespan? After harvest, remove soil, store the wire flat, and reuse next season. For extra height, stack two wire frames with cardboard spacers between layers. My tomato plants grew 30% taller in a 12”-deep wire bed compared to ground soil!
Ready to skip the store-bought kits? Grab your wire, 30 minutes, and a shovel for soil—that’s all you need. Your first harvest could be lettuce in 4 weeks or bush beans in 6!
Best vegetables for chicken wire raised beds (and why they thrive)
A chicken wire vegetable garden creates a flexible, budget-friendly space perfect for certain vegetables that thrive in contained environments. The key is choosing plants that don't require deep soil or sprawling root systems—leafy greens, compact root crops, and bush varieties grow exceptionally well.
The wire frame also doubles as a pest barrier, protecting tender plants from rabbits and deer while allowing airflow to prevent fungal diseases.
I’ve tested these top 10 vegetables in my own chicken wire raised beds, and they consistently outperform in yield and health. The secret? Matching the plant’s space needs to the wire frame’s dimensions—most do well in 2'x4' or 3'x6' frames.
Below, you’ll see which vegetables thrive in tight spaces and why their growth habits make them ideal for this setup.
| Vegetable | Sun Needs | Mature Size | Harvest Time | Wire Frame Fit |
|---|---|---|---|---|
| Lettuce | 6+ hours | 12-18" tall | 45-60 days | 2'x4' frame |
| Radishes | 4-6 hours | 6-12" tall | 25-30 days | 1'x2' frame |
| Bush Beans | 6-8 hours | 18-24" tall | 50-60 days | 3'x3' frame |
| Carrots (short varieties) | 6+ hours | 6-10" long | 60-70 days | 2'x4' frame |
| Spinach | 4-6 hours | 12-18" tall | 40-50 days | 2'x3' frame |
| Swiss Chard | 6+ hours | 18-24" tall | 50-60 days | 3'x4' frame |
| Kale | 6+ hours | 18-24" tall | 55-65 days | 3'x4' frame |
| Green Onions | 4-6 hours | 12-18" tall | 30-40 days | 1'x2' frame |
| Basil | 6+ hours | 12-24" tall | 45-60 days | 2'x2' frame |
| Cilantro | 4-6 hours | 12-18" tall | 40-50 days | 1'x2' frame |
My favorite space-saving picks are radishes and green onions—they mature in under 40 days, giving you quick harvests in small frames. For longer-term yields, bush beans and Swiss chard produce continuously for weeks, making them perfect for 3'x4' chicken wire beds.
Pro tip: Use the wire’s vertical space by training bush varieties to climb slightly—it maximizes your harvest without expanding the frame.
When planning your layout, prioritize sunlight exposure. Most of these vegetables need 6+ hours of direct sun, so position your chicken wire frames south-facing in the Northern Hemisphere.
I’ve found that leafy greens like spinach tolerate partial shade better than root crops, so they’re ideal for the north side of frames where sunlight might be limited.
Avoid planting large root vegetables like potatoes or winter squash in chicken wire beds—they need deeper soil and more space. Instead, focus on shallow-rooted, high-yield crops that thrive in the <