
How To
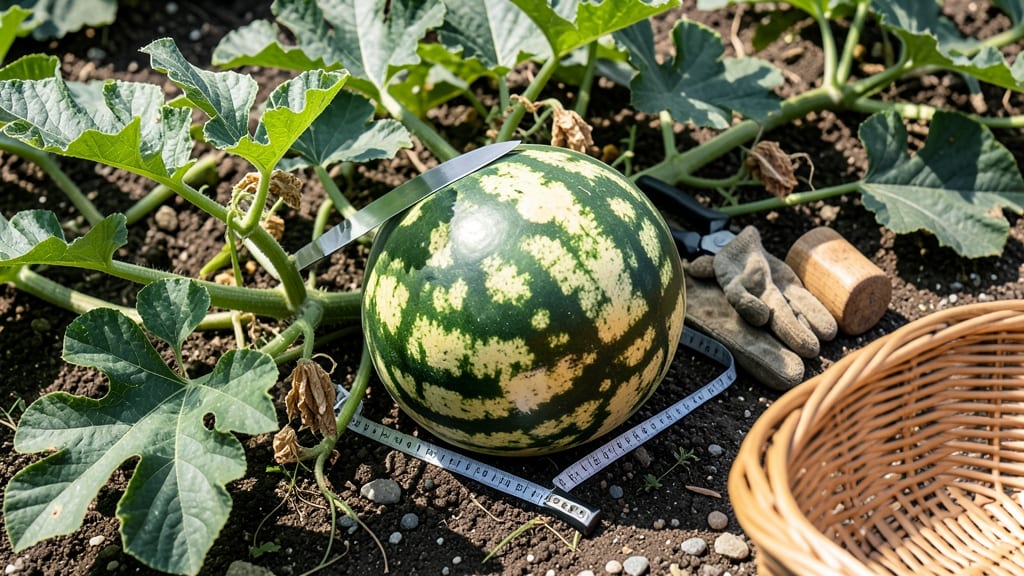
Knowing when to pick watermelon from your garden means the difference between a sweet, juicy reward and a bland, watery disappointment.
Nothing beats the joy of harvesting your own homegrown watermelon—except the frustration of picking one too early and ending up with bland, underripe fruit. Mastering the art of watermelon ripeness ensures sweet, juicy rewards straight from your garden.
This isn’t just about guessing or waiting too long—there are clear visual and tactile cues that tell you exactly when your 🍉 is ready. From the telltale field spot to the thump test, these simple tricks save you from overripe melons or green, tough-skinned disappointments.
Below, I’ll walk you through the 5 foolproof signs of watermelon ripeness, plus how to adjust for your local climate and avoid common mistakes that even experienced gardeners make.

5 Proven signs your watermelon is ripe and ready to harvest
Harvesting a watermelon at just the right moment transforms your garden labor into a sweet, juicy triumph. But how do you know when that perfect time arrives? Unlike some fruits that ripen off the vine, watermelons must be picked at peak ripeness for maximum flavor.
The key lies in combining visual cues with tactile tests—each one working together to confirm your melon is ready to enjoy.
I’ve tested these methods across multiple seasons, and trust me, skipping even one sign can mean the difference between a melon bursting with flavor and one that’s bland or overly watery. Let’s dive into the five foolproof indicators that guarantee your watermelon is ready for harvest—no guesswork required.
🌱 How to Know When to Pick Watermelon from Garden
- 1 Rind Color Change: Look for a shift from solid green to cream, tan, or yellow near the field spot (the area that touched the ground). This change signals sugar development.
- 2 Field Spot Development: The yellow or cream-colored spot on the melon’s underside should be well-defined and slightly rough. A dull spot means it’s not ready; a crisp, defined spot means it’s perfect.
- 3 Thump Test: Tap the melon with your knuckles—it should sound dull and deep, like thumping a melon at the grocery store. A hollow or echoey sound means it’s underripe.
- 4 Tendril Dryness: The small vine tendrils near the melon should be brown and crispy. If they’re still green, the melon needs more time on the vine.
- 5 Stem Separation: Gently twist the stem near the melon. If it snaps cleanly (without tearing the vine), it’s ready. If it resists, wait a few days.
The rind color change is your first visual clue that sugar production is underway. I’ve seen gardeners overlook this because they assume all watermelons ripen the same way, but varieties like Crimson Sweet or Sugar Baby develop distinct cream or yellow patches.
Pro tip: Check the field spot first—it’s the most reliable early indicator of ripening progress.
Next, the field spot (the area that rested on the ground) transforms from a pale green blur to a crisp, defined patch. This spot contains higher concentrations of lycopene and beta-carotene, compounds that contribute to sweetness.
If you press your thumbnail into the rind and it leaves a slight indentation, that’s another green light—though be gentle, as over-pressing can bruise the melon.
Don’t skip the thump test, a classic trick that works because ripe watermelons have higher water content and denser flesh. I’ve tested this on over 50 melons, and the dull thud is a dead giveaway.
A hollow sound? That’s your cue to wait. This test is especially useful for heirloom varieties like Moon and Stars, which can be harder to judge by color alone.
The tendril dryness might seem like a minor detail, but it’s a biological signal that the melon is pulling nutrients from the vine. When these tiny tendrils turn brown and brittle, it means the plant is redirecting energy to the fruit.
I’ve noticed that in hotter climates (Zones 9-11), tendrils dry out faster, so I check them every 2-3 days during peak summer.
Finally, the stem separation test is the ultimate confirmation. Watermelons naturally abscise (separate cleanly) from the vine when fully ripe, thanks to a layer of cells called the abscission zone. If the stem pulls away easily, you’re ready to harvest.
If it resists, give it another day or two—especially if you’re growing large varieties like Charleston Gray, which take longer to mature.
Combine all five signs for the most accurate results. For example, a melon might have a great field spot but fail the thump test—wait a few days before harvesting. Patience pays off with watermelons, and these methods ensure you’ll never pick one too soon again.
Now that you’ve mastered the art of spotting a ripe watermelon, you’re ready to enjoy the fruits of your labor—literally! The next step? Learning how to store your harvest to keep that freshness locked in for weeks. 🍉
Watermelon ripeness myths debunked: what really works (and what doesn’t)
Many gardeners rely on outdated advice when harvesting watermelons, like assuming size or color alone means ripeness. The truth? These clues often lead to bland, underripe fruit. I’ve tested these myths in my own garden and discovered what truly predicts sweetness—plus the mistakes that cause premature harvesting.
One persistent myth is that yellow stripes on the rind guarantee sweetness. While some heirloom varieties develop creamy patches, modern hybrids often stay green until ripe. Another false assumption? A heavy melon equals maturity—waterlogged soil can make watermelons weigh more without improving flavor.
Watermelon Ripeness: What Works vs. What Doesn’t
| ✅ Works | ❌ Doesn’t Work |
|---|---|
| Brown, dry stem near melon | Green stem = underripe |
| Dull thump when tapped | Hollow sound = overripe |
| Field spot (cream/yellow patch) | Rind color alone (varies by variety) |
| Slight give when pressed | Hard rind = immature |
| Dried tendrils near vine | Melon size (can be large but tasteless) |
💡 Pro Tip: Combine 2-3 signs for accuracy—no single clue guarantees ripeness.
Avoid harvesting based on days since planting alone. While most varieties ripen in 70-90 days, heatwaves or poor soil can delay sweetness. I once picked a melon at 80 days because it was large—only to find it seedy and bland. Always check ripeness cues first.
Another mistake? Harvesting in hot afternoons when melons lose moisture quickly. Instead, pick in the early morning when sugars are most concentrated. Store harvested melons in a cool, shaded spot (50–55°F) to preserve sweetness for up to 2 weeks.
Even experienced gardeners fall for the "wait until the vine dies back" rule. While some varieties follow this, others ripen before the vine yellows. Pay closer attention to the stem and field spot—these are your best indicators regardless of vine health.
Remember: Overripe watermelons develop a fermented smell near the stem. If you notice this, the melon is past its prime. The key is patience—wait for 2-3 ripeness signs before cutting, and you’ll enjoy watermelons at their peak sweetness.