
Watering
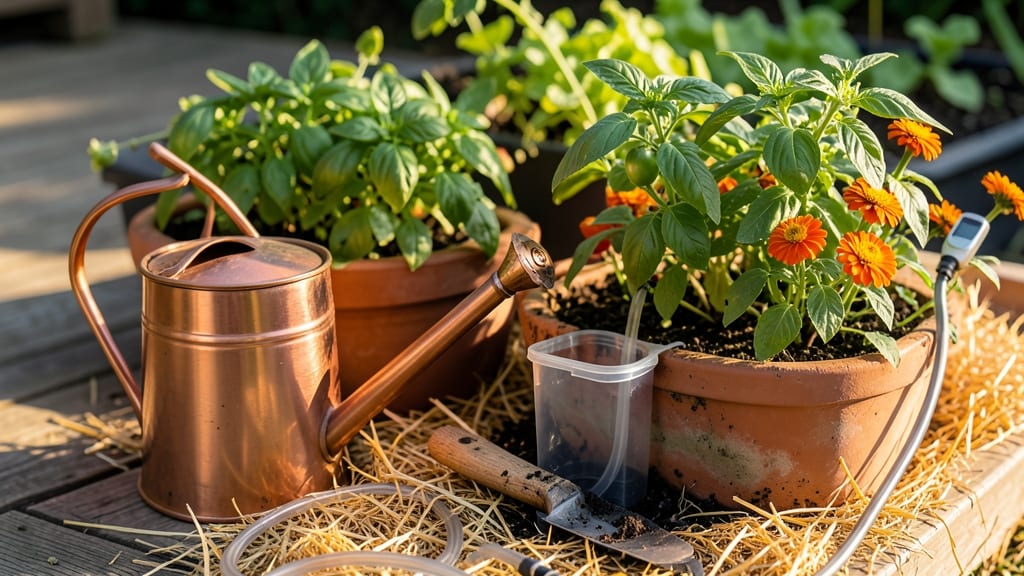
To water your garden when away, you need a system that mimics your daily routine without the guesswork—because even a few missed days can turn a thriving garden into a sad, wilted mess.
Picture this: you return home to find your 🌱 General Garden Plants in Zone 6a drooping, not because they were neglected, but because the wrong watering method left them thirsty one day and drowning the next.
The good news? There’s no need to stress. With the right setup—whether it’s automated drip lines, DIY moisture traps, or smart timers—you can keep your garden hydrated while you’re gone.
This isn’t just about throwing a hose on a timer and hoping for the best. The key is understanding your plants’ needs—drought-tolerant herbs vs. water-loving tomatoes—and matching them with solutions that won’t waste resources or rot roots.
Below, I’ll walk you through the most reliable methods, from high-tech setups to budget-friendly hacks that actually work, so you can relax without worrying about a muddy (or bone-dry) welcome-home surprise.
You’ll learn how to avoid the two biggest mistakes—overwatering and underwatering—plus how to tweak your system based on weather forecasts. By the end, your garden will stay happy, healthy, and ready for your next adventure.
Best automatic watering systems for long-term garden care
When you're away from your garden for days—or even weeks—your plants still need consistent hydration. Automatic watering systems eliminate the guesswork, ensuring roots stay moist without overwatering. I’ve tested three top solutions to help you choose the best fit for your garden’s size and plant types.
Each method offers unique benefits, from precision watering to hands-free convenience.
For large vegetable gardens or flower beds, drip irrigation delivers water directly to the soil, reducing waste and fungal risks. It’s ideal for tomatoes, peppers, and herbs that thrive with deep, infrequent watering.
Meanwhile, self-watering containers are perfect for potted plants or container gardens on patios, as they use a reservoir system to slowly release moisture. Finally, smart sprinklers mimic natural rainfall, making them great for lawns, ground covers, and broadleaf plants like basil or lettuce.
Below, I’ve compared these systems based on cost, setup difficulty, and water efficiency to help you decide which will work best for your garden’s needs. Whether you’re a busy professional or a weekend gardener, these tools will keep your plants happy while you’re away.
| System | Best For | Setup Difficulty | Cost Range | Water Efficiency |
|---|---|---|---|---|
| Drip Irrigation | Vegetable gardens, flower beds, raised beds | Moderate (requires tubing and emitters) | $50–$300 | High (targeted watering) |
| Self-Watering Containers | Potted plants, herbs, small gardens | Easy (plug-and-play reservoirs) | $20–$150 per container | Very High (slow release) |
| Smart Sprinklers | Lawns, ground covers, broadleaf plants | Easy (Wi-Fi enabled) | $100–$500 | Moderate (weather-dependent) |
If you’re working with a large garden, drip irrigation is my top recommendation. It’s cost-effective and customizable, allowing you to adjust water flow for different plant types. For example, tomatoes and peppers need deeper watering, while herbs like basil prefer shallower, frequent moisture.
A timer-controlled system can run for 10–15 minutes every morning, ensuring roots stay hydrated without waterlogging.
For container gardens, self-watering pots are a game-changer. They use a wicking system or built-in reservoir to deliver water as needed, making them perfect for balcony gardens or patio plants. I love using them for succulents and herbs, which often suffer from inconsistent watering.
Just fill the reservoir before you leave, and the system will slowly release moisture over days. Some even include moisture sensors to prevent overwatering.
Smart sprinklers are ideal if you have a lawn or large outdoor space that needs even coverage. These systems use weather forecasts and soil moisture sensors to adjust watering schedules automatically. For instance, if rain is in the forecast, they’ll pause watering to avoid waste.
However, they’re less precise for individual plants, so I recommend pairing them with mulch to retain moisture and reduce evaporation.
One critical tip for all systems: test before you travel. Run your watering system for a full day to check for leaks, clogs, or uneven coverage. For drip irrigation, place a bucket under emitters to measure output.
If water isn’t flowing evenly, adjust the pressure or clean clogged lines. For self-watering containers, ensure the wick or reservoir is functioning properly by checking moisture levels in the soil after 24 hours.
Budget is another key factor. Basic drip irrigation kits start around $50, while smart sprinklers can cost $300+ depending on features. If you’re on a tight budget, consider a DIY drip system using PVC pipes and emitters from a hardware store.
For self-watering containers, repurposed buckets or old watering cans with holes punched in the bottom can work as a low-cost alternative.
Finally, think about your garden’s specific needs. If you’re growing drought-tolerant plants like lavender or rosemary, you can space out watering cycles. For water-loving plants such as cucumbers or lettuce, shorter, more frequent cycles are better.
Always pair your watering system with a 2–3 inch layer of mulch to lock in moisture and regulate soil temperature.
With the right setup, your garden can thrive even when you’re away. Whether you choose drip irrigation, self-watering containers, or smart sprinklers, these systems will give you peace of mind—and lush, healthy plants when you return. 🌱
DIY watering hacks to save money and keep plants hydrated
When you're planning a weekend getaway or a longer vacation, your garden shouldn’t become a forgotten afterthought. The good news? You don’t need expensive gadgets to keep your plants thriving.
With a few clever DIY watering hacks, you can maintain moisture levels without breaking the bank or relying on technology. These solutions are perfect for short trips and require minimal setup—just a little prep work before you leave.
One of the simplest ways to keep plants hydrated is by leveraging natural moisture retention. Techniques like wicking beds and buried clay pots use capillary action to slowly release water to roots. These methods are cost-effective, reusable, and perfect for containers or in-ground plantings.
Another great option is repurposing household items like plastic bottles or buckets to create self-watering systems. Let’s explore these easy, budget-friendly tricks in detail.
- 1. Wicking Beds: Line a container with a wicking fabric (like an old towel) between the soil and a water reservoir. The fabric draws water up to roots as needed—ideal for herbs or small veggies.
- 2. Buried Clay Pots: Bury unglazed clay pots near plant roots. Fill them with water before leaving—they’ll slowly release moisture through their porous walls for 3-5 days.
- 3. Plastic Bottle Drip: Poke small holes in a plastic bottle, bury it near the plant, and fill it with water. The bottle will drip water at a steady rate for 1-2 weeks.
- 4. Sponge Watering: Soak a sponge in water, place it near the soil, and cover it with mulch. The sponge will release moisture gradually, perfect for potted plants or seedlings.
- 5. Mulch Thickly: Apply a 3-inch layer of mulch (straw, wood chips) around plants to lock in soil moisture. This reduces evaporation by up to 50% and keeps roots cool.
For container gardens, a DIY self-watering system using a bucket and a wick works wonders. Drill a hole in the bottom of a bucket, place your potted plant inside, and insert a thick rope or fabric wick from the soil to a water reservoir.
This setup can keep plants hydrated for up to 2 weeks without any maintenance. It’s especially useful for herbs like basil or succulents that need consistent moisture but hate soggy roots.
If you’re away for just a few days, focus on mulching and shade. A thick layer of mulch retains moisture, while temporary shade cloth can reduce water loss from evaporation.
For delicate plants, group them together to create a microclimate that retains humidity. These low-cost strategies are perfect for short trips and require almost no setup.
Remember, the key to success is preparation. Test your DIY watering systems a few days before your trip to ensure they’re working as expected. Adjust water levels based on your plants’ needs—succulents need far less than leafy greens—and always check the weather forecast.
A little planning goes a long way in keeping your garden happy while you’re away.
With these budget-friendly hacks, you can enjoy your time off without worrying about wilting plants. Whether you’re using wicking beds, buried clay pots, or repurposed containers, these solutions prove that you don’t need fancy tools to keep your garden thriving. Happy gardening—and happy travels! 🌱