
Tools
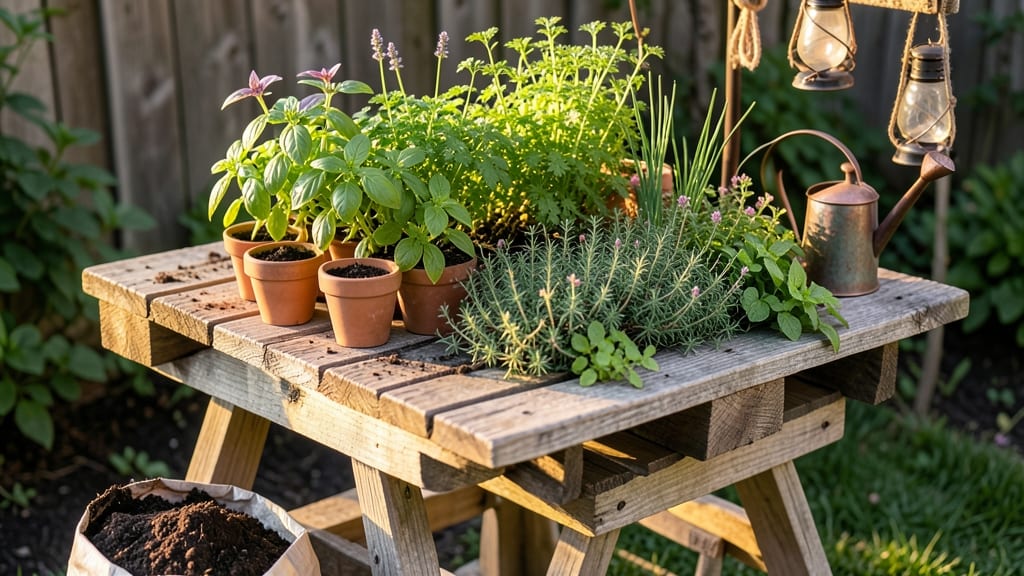
A pallet gardening table turns scrap wood into a portable, space-saving oasis for growing your own 🌱 herbs, veggies, or flowers—no yard required.
Picture this: a sturdy, customizable table that fits snugly on a balcony, patio, or even a rooftop, giving you fresh produce without the bulk of traditional raised beds.
Whether you're a city dweller with limited space or a gardener looking to maximize efficiency, this DIY project is the game-changer you’ve been waiting for.
No fancy tools or expensive materials are needed—just a few pallets, some creativity, and a little elbow grease. Below, I’ll walk you through simple steps to build one, share design ideas for any space, and reveal the best plants to grow in your new mobile garden.
Ready to transform your outdoor area into a thriving, self-sustaining green space? Let’s get started!
How to build a sturdy pallet gardening table in 6 simple steps
Transforming limited urban spaces into thriving gardens doesn’t require expensive raised beds—just a few pallets and some creativity. This pallet gardening table solution turns scrap wood into a functional, space-saving green oasis perfect for herbs, veggies, or flowers.
The best part? It’s eco-friendly, budget-friendly, and customizable to fit any patio, balcony, or rooftop. Let’s dive into how to build one that’s both durable and plant-friendly.
Before you start, gather your materials: 2-3 wooden pallets (heat-treated or stamped "HT"), 2x4 lumber for support, outdoor screws, landscape fabric, and well-draining potting soil. Safety first!
Wear gloves and a mask when handling pallets, as they may have splinters or nails. Always check for HT (heat-treated) stamps to avoid toxic chemicals like MB (methyl bromide).
Measure your space and plan your table dimensions. A standard 4x4-foot table works well for most urban gardens, but adjust based on your patio size. For stability, aim for a 2-foot height—low enough to access easily but high enough to prevent soil spillage.
Sketch a simple design to visualize how the pallets will stack and connect.
Now, let’s get to the step-by-step assembly. Below, you’ll find a clear guide to ensure your table is sturdy, stable, and ready for planting.
6-Step Pallet Gardening Table Assembly
- Step 1: Prep the Pallets
Sand down rough edges and remove any protruding nails or screws. Use a drill or screwdriver to secure loose boards. Drill 1-inch drainage holes along the bottom of each pallet using a hole saw or spade bit. This prevents waterlogging and root rot. - Step 2: Build the Base Frame
Lay two pallets side by side to form the tabletop. Use 2x4 lumber to create a rectangular frame around the edges. Secure the frame with 3-inch deck screws to ensure stability. Add a third pallet as a support beam underneath for extra strength. - Step 3: Add Support Legs
Attach 4x4-inch posts to the corners of the frame using 4-inch lag bolts. Cut the posts to a 2-foot height for easy access. For added mobility, consider adding plastic casters to two of the legs.
< - Step 4: Line with Landscape Fabric
Cover the inside of the pallets with landscape fabric to prevent soil from falling through the gaps. Staple the fabric securely to the edges. This also helps retain moisture and reduces weed growth. - Step 5: Fill with Soil
Add a 2-inch layer of gravel at the bottom for drainage, then fill the pallets with well-draining potting mix. Avoid garden soil, as it compacts and drains poorly in containers. Mix in compost for nutrients. - Step 6: Plant and Secure
Arrange your plants in the soil, spacing them according to their mature size. For example, basil needs 12 inches apart, while radishes can be planted 2 inches apart. Water thoroughly and add mulch to retain moisture.
Pro tip: To make your table even more versatile, add a rolling trellis for climbing plants like cucumbers or beans. Simply screw a small wooden lattice to the side of the table and train vines to grow upward. This maximizes space and adds vertical interest to your garden.
Once your table is built, place it in a location with 6+ hours of sunlight for most vegetables. Herbs like thyme or parsley can tolerate partial shade. Water deeply in the morning to reduce evaporation, and fertilize every 4-6 weeks with a balanced 10-10-10 fertilizer during the growing season.
With your new pallet gardening table, you’ll enjoy fresh herbs, veggies, or flowers without the hassle of traditional raised beds. Plus, you’ve given new life to repurposed materials—what could be greener than that? Happy gardening! 🌱
Best pallet gardening table designs for small spaces
When space is limited but your green thumb isn't, a pallet gardening table becomes your best friend. These designs maximize growing potential without sacrificing precious square footage. Whether you're working with a balcony, patio, or rooftop, the right design can transform dead space into a productive garden.
Let's explore five space-efficient options that balance functionality and aesthetics.
For urban gardeners, choosing the right design depends on your specific needs. Do you need something portable for easy access or wall-mounted to save floor space? Below, I’ve compared five popular designs—each with unique benefits for small spaces.
The key is selecting materials that resist weather and provide durability, like cedar or pressure-treated lumber for pallets.
🌱 comparison-table
| Design Type | Best For | Space Efficiency | Materials Needed | Pros | Cons |
|---|---|---|---|---|---|
| Wall-Mounted Pallet Garden | Balconies, Patios | High (vertical space) | Pallets, L-brackets, screws, weatherproof sealant | Saves floor space, easy access | Requires sturdy wall, limited soil depth |
| Tiered Pallet Table | Patios, Rooftops | Very High (3+ levels) | Pallets, sturdy legs, plywood | Maximizes planting area, great for herbs | Harder to water, may need support |
| Foldable Pallet Garden | Balconies, Small Patios | Moderate (compact when folded) | Pallets, hinges, wheels | Portable, easy storage, versatile | Less stable when unfolded, requires assembly |
| Vertical Pallet Planter | Rooftops, Tiny Spaces | Extreme (wall or freestanding) | Pallets, trellis, screws, wire mesh | Saves floor space, great for vines | Limited soil depth, needs support |
| Freestanding Pallet Table | Patios, Gardens | Moderate (single level) | Pallets, legs, sandpaper, paint | Stable, customizable height | Takes up floor space, less portable |
If you're working with a balcony, the wall-mounted pallet garden is a game-changer. It frees up floor space while keeping your plants within arm’s reach. For rooftops, a vertical pallet planter is ideal—it maximizes vertical space and works well for climbing plants like beans or cucumbers.
Just ensure your structure can handle the weight, especially after watering.
For those who love mobility, a foldable pallet garden table is perfect. It folds up when not in use, making it easy to store or move around. However, stability can be an issue, so reinforce it with additional brackets or wheels.
If you're growing herbs or leafy greens, a tiered pallet table lets you plant more in the same footprint—just be mindful of watering each level evenly.
Durability is key, especially in urban environments. Treat your pallets with a weather-resistant sealant or paint to protect against moisture and pests. For extra stability, reinforce the legs with metal brackets or angled supports. With the right design, your