
Vegetables
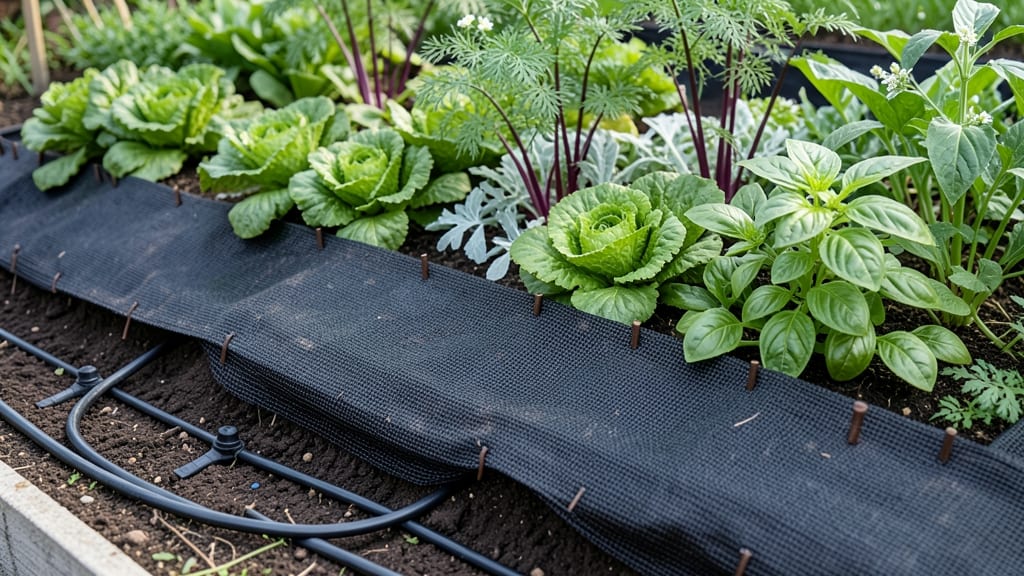
Guarding your garden against weeds is the smartest move for a low-maintenance, high-yield growing space this spring.
Picture this: you walk out to your garden after a long week, and instead of wrestling with stubborn weeds, you see healthy soil ready for planting. That’s the power of a weed guard—a simple yet game-changing tool that blocks weeds without harming your plants.
Whether you’re dealing with vegetable beds, flower gardens, or pathways, the right weed guard can cut your weeding time by up to 90% while keeping moisture locked in.
But not all weed guards are created equal. Some let water and air through, while others smother the soil entirely. The best options—like landscape fabric, mulch mats, or even cardboard—work by starving weeds of sunlight while still allowing your plants to thrive.
In this guide, you’ll learn how to choose the right type, install it in just three weeks, and avoid common mistakes that turn a good solution into a headache.
Ready to reclaim your weekends? Let’s dive into how to pick, install, and maintain a weed guard that keeps your garden looking effortless—all year long.
How weed guards work: best types for garden protection
A weed guard is your secret weapon against unwanted plants that steal nutrients and space from your garden. These barriers work by blocking sunlight, which weeds need to germinate and grow.
Without light, weed seeds remain dormant, saving you hours of backbreaking work. The best part? They preserve soil health while keeping your garden tidy—no chemicals required!
Weed guards come in various forms, each with unique benefits. Some let water and air reach your plants, while others create a complete barrier. The key is choosing the right type for your garden's needs—whether it's a vegetable patch, flower bed, or pathway.
Let’s break down how they work and which one might be perfect for you.
Here’s how weed guards block weeds effectively: They create a physical barrier that prevents seeds from reaching the soil. Without sunlight, weeds can’t photosynthesize, starving them out. At the same time, they allow water and nutrients to penetrate, keeping your plants happy.
The best weed guards also improve soil moisture retention, reducing the need for frequent watering.
| Type | How It Works | Pros | Cons | Best For |
|---|---|---|---|---|
| Organic Mulch | Blocks light, retains moisture, breaks down over time | Improves soil, eco-friendly, allows water/air | Breaks down, needs replenishing | Vegetable gardens, flower beds |
| Landscape Fabric | Blocks light, allows water/air, long-lasting | Durable, reusable, effective for years | Can trap heat, may need cutting for plants | Pathways, raised beds, perennial gardens |
| Cardboard | Blocks light, breaks down into soil, cheap | Free, biodegradable, improves soil | Short-term use, can blow away | Temporary suppression, seed starting |
| Plastic Sheeting | Blocks light completely, retains moisture | Long-lasting, effective, prevents weeds 100% | Traps heat, not eco-friendly, hard to remove | Greenhouses, high-weed areas |
Organic mulch, like straw or wood chips, is a favorite among gardeners because it breaks down over time, enriching the soil with nutrients. It’s perfect for vegetable gardens and flower beds where you want to improve soil health. However, it requires regular replenishing since it decomposes faster than synthetic options.
If you’re looking for a long-term solution, landscape fabric is a top choice. It blocks weeds while allowing water and air to reach your plants. Fabric is reusable and works well in raised beds or under mulch layers.
Just remember to cut holes for plant stems to avoid suffocating your crops.
Cardboard is a budget-friendly, eco-conscious option that works wonders for short-term weed suppression. It blocks light and breaks down into the soil, adding organic matter. I’ve used it in my seed-starting trays and under new plantings to give them a head start. Just wet it down before laying it to prevent it from blowing away.
For areas with persistent weeds, like driveways or greenhouses, plastic sheeting is the most effective. It creates a complete barrier, blocking all light and preventing weeds from sprouting. However, it can trap heat and isn’t eco-friendly, so use it sparingly or in areas where aesthetics aren’t a concern.
Each type of weed guard has its place in the garden. The key is to match the material to your specific needs—whether you prioritize soil health, durability, or eco-friendliness.
For example, I use landscape fabric under my perennial beds for long-term protection, while cardboard gets the job done in my temporary planting areas.
Proper installation is crucial for maximum effectiveness. Whether you choose organic mulch, fabric, cardboard, or plastic, ensure it’s snug against the soil to prevent weeds from popping up at the edges. Overlap pieces by at least 6 inches to create a seamless barrier.
For organic options, top them with a layer of mulch to keep them in place and improve their weed-blocking power.
Weed guards aren’t just about stopping weeds—they also help retain soil moisture, reducing your watering needs. This is especially helpful in drought-prone areas or during hot summer months.
Plus, they keep your garden looking neat and professional, making it easier to enjoy your outdoor space without the hassle of constant weeding.
Ready to transform your garden? Start by assessing your needs—do you want a temporary solution or something long-lasting? Choose the weed guard that fits your style and watch your garden thrive without the unwanted competition. Happy gardening! 🌱
Step-by-step guide: installing weed guard in 3 simple weeks
Installing a weed guard is one of the best ways to eliminate weeds without chemicals. Over 3 weeks, you can transform your garden into a low-maintenance, weed-free zone.
The key is proper soil prep, choosing the right material, and following a structured installation process. Let’s break it down into manageable steps to ensure long-term success.
Before diving in, pick the right weed guard material—landscape fabric, cardboard, or mulch mats—based on your garden type. Each has unique benefits, like water retention or biodegradability.
For example, landscape fabric works well for pathways, while cardboard is great for vegetable beds. Once you’ve chosen, you’re ready to prep your soil and start installing.
-
1
Week 1: Clear and Prep the Soil
Remove existing weeds and debris from your garden bed. Loosen the top 2-3 inches of soil to improve aeration. If your soil is dry, water it deeply to help the weed guard lay flat.
-
2
Week 2: Choose and Lay the Weed Guard
Spread your chosen weed guard material over the bed, ensuring it overlaps edges by 2-3 inches. Secure it with landscape staples or rocks to prevent shifting. For raised beds, cut the material to fit snugly.
-
3
Week 3: Plant and Maintain
Cut small holes in the weed guard where you’ll plant. Add compost or mulch around plants to retain moisture. Check weekly for gaps or shifting material and adjust as needed.
After installation, monitor your weed guard for 3 weeks to ensure it’s working effectively. If you notice weeds sprouting through gaps, reinforce the edges or add extra layers. Over time, your weed suppression will improve, reducing manual weeding by up to 90%.
This method also helps retain soil moisture, making your garden more resilient during dry spells.
For long-term success, consider adding a thin layer of mulch on top of the weed guard. This not only enhances its effectiveness but also improves the appearance of your garden.
Mulch also regulates soil temperature, benefiting your plants during hot summers or cold winters. With minimal effort, you’ll enjoy a cleaner, healthier garden all season long.
One common misconception is that weed guards smother plants entirely. In reality, they allow water and air to reach the soil while blocking sunlight—critical for weed seeds.
Always ensure your material has perforations or breathability to avoid compacting the soil. With these tips, your weed-free garden will thrive for years to come!
Ready to get started? Grab your materials, follow the steps, and watch your garden transform into a low-maintenance paradise in just 3 weeks. Your future self will thank you for the time saved—and the joy of gardening without the weeds! 🌱