
Picking
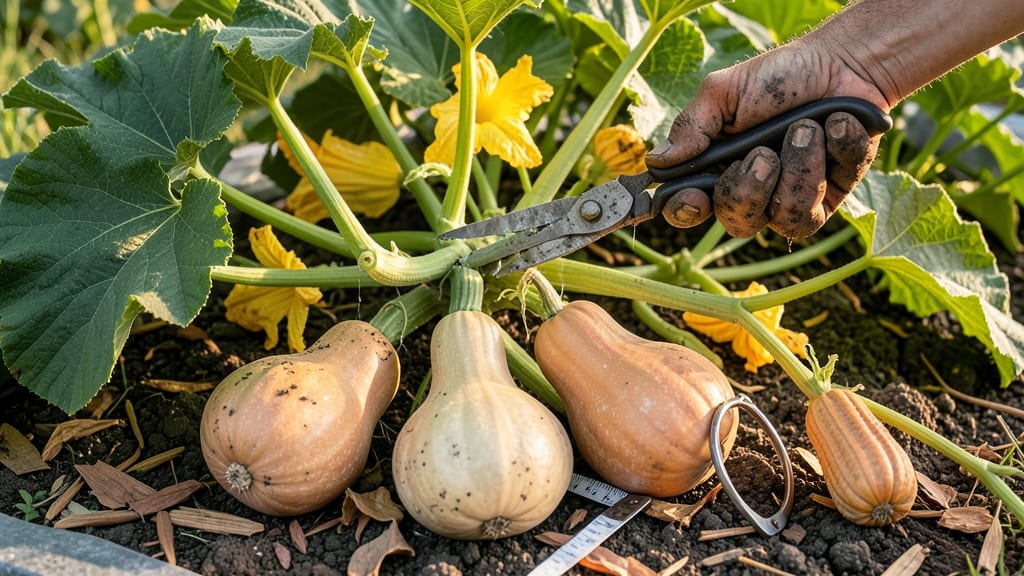
Harvesting butternut squash 🎃 at the right time means the difference between sweet, creamy flesh and tough, flavorless disappointment—and the secret is in those three little tests you can do right in your garden.
Picture this: you’ve spent all summer nurturing your vines, and now the squash are the size of footballs, but you’re not sure if they’re ready. One wrong move, and you’ll either end up with a rock-hard rind or a squash that’s already past its prime.
Below, I’ll walk you through the three foolproof toughness tests—from skin color shifts to stem separation—that tell you exactly when to pick. No guesswork, just perfect timing for that ideal buttery texture.
You’ll also learn how to handle them post-harvest so they last through winter, plus what happens if you harvest too early (or too late) and how to avoid those mistakes next season.
3 Toughness tests to determine perfect butternut squash harvest time
Harvesting butternut squash at the right moment transforms your garden bounty into sweet, flavorful perfection. Too early, and you’ll end up with watery flesh and thin rinds—too late, and the skin toughens while the inside becomes stringy and seedy.
The key? These 3 field-tested toughness tests that reveal when your squash is ready to pick. I’ve used them for years in my garden, and they’ve never failed me.
The first test is the most reliable for most gardeners: the thumbnail press. This simple method tells you whether the rind has reached the ideal hardness. When done right, it’s foolproof.
Pair it with the skin color shift and stem separation test, and you’ll never second-guess your harvest timing again. Let’s dive into each method so you can confidently pick your squash at peak ripeness.
Thumbnail Press Test
Press your thumbnail into the skin near the stem. If it leaves a slight dent but doesn’t puncture, the squash is ready. A deep puncture means it’s overripe and past its prime.
Skin Color Shift
Look for a tan or beige color replacing green on the squash’s skin. Start checking when the squash reaches 8-10 inches long. A fully tan rind means it’s ready to harvest.
Stem Separation Test
Gently twist the stem near the vine. If it snaps cleanly or pulls away with minimal resistance, the squash is ready. A green, flexible stem means it’s not ripe yet.
Start with the thumbnail press test because it’s the fastest way to check ripeness. I always do this first thing in the morning when the squash is cool and firm. If the skin passes this test, move on to the skin color shift.
A butternut squash should have at least 50% tan coloring before you consider harvesting. This color change happens gradually, so don’t rush it—patience here means better flavor later.
The stem separation test is my favorite because it’s a clear sign the squash is ready to pick. When the stem dries out and separates easily, it means the squash has finished maturing.
This test is especially useful for heirloom varieties like ‘Long Neck,’ which can take longer to ripen. If the stem is still green and flexible, give the squash another week or two.
One common mistake I see in gardens is harvesting squash that’s too large. While size can be a rough guide, it’s not the best indicator of ripeness. A butternut squash can keep growing even after it’s ready to eat, but its flavor and texture will suffer.
Focus on the toughness tests instead of just the size—this ensures you get the sweetest, most flavorful squash possible.
If you’re harvesting in cooler climates, time your picking to avoid the first frost. Butternut squash can tolerate light frosts, but heavy frost will damage the skin and reduce storage life. Aim to harvest at least 1-2 weeks before the first expected frost to give yourself flexibility.
Store your freshly picked squash in a cool, dry place with good airflow to extend its shelf life for up to 6 months.
Pro tip: Use a sharp pruning shear to cut the stem when harvesting. This prevents damage to the squash and makes it easier to store. After cutting, let the squash cure in the sun for 10-15 days to harden the skin further.
This curing process enhances flavor and improves storage potential. Place the squash in a warm, dry spot—like a garage or porch—for the best results.
Remember, every butternut squash variety ripens slightly differently. ‘Waltham’ tends to mature faster than ‘Long Neck,’ so adjust your timing based on what you’re growing. Keep an eye on your plants, and don’t hesitate to use all three tests to confirm ripeness.
When you nail the perfect harvest time, you’ll be rewarded with sweet, nutty squash that’s perfect for roasting, baking, or pureeing.
Now that you know these 3 toughness tests, you’re ready to harvest like a pro. Happy gardening, and may your squash be sweet and abundant this season! 🎃
Butternut squash ripeness timeline: days to maturity by variety
Understanding the butternut squash ripeness timeline is key to harvesting at peak flavor. Most varieties take 75-100 days from transplanting to harvest, but timing varies by type and climate. In my Zone 6a garden, I’ve found 'Waltham' matures fastest, while heirlooms like 'Long Neck' need extra warmth.
Your local climate plays a huge role—cooler regions may extend maturity by 10-15 days, while hotter areas can speed things up. For example, my southern neighbors often harvest 2 weeks earlier than me. Tracking growth stages helps adjust expectations.
After flowering (30-40 days post-transplant), your squash will begin forming. This is when I start checking for 3 key ripeness signs: skin hardness, color change, and stem drying. In my experience, 'Waltham' varieties often show these signs first, while heirlooms lag behind.
If you're in a short-season area, prioritize faster-maturing varieties like 'Sugar Loaf' and use black plastic mulch to warm soil. This can shave off 5-7 days from maturity. I’ve seen dramatic results by planting in early May with row covers.
Watch for first frost warnings—butternut squash stores well, but overripe fruit in cold weather loses sweetness. In my Zone 6a garden, I aim to harvest by late October to avoid frost damage. Curing harvested squash at 80°F for 10 days maximizes flavor and storage life.
Remember: Climate adjustments are everything. My northern friends harvest 2 weeks later than I do, while southern gardeners often pick by September. Always account for your local frost dates when planning harvest timing.