
Picking
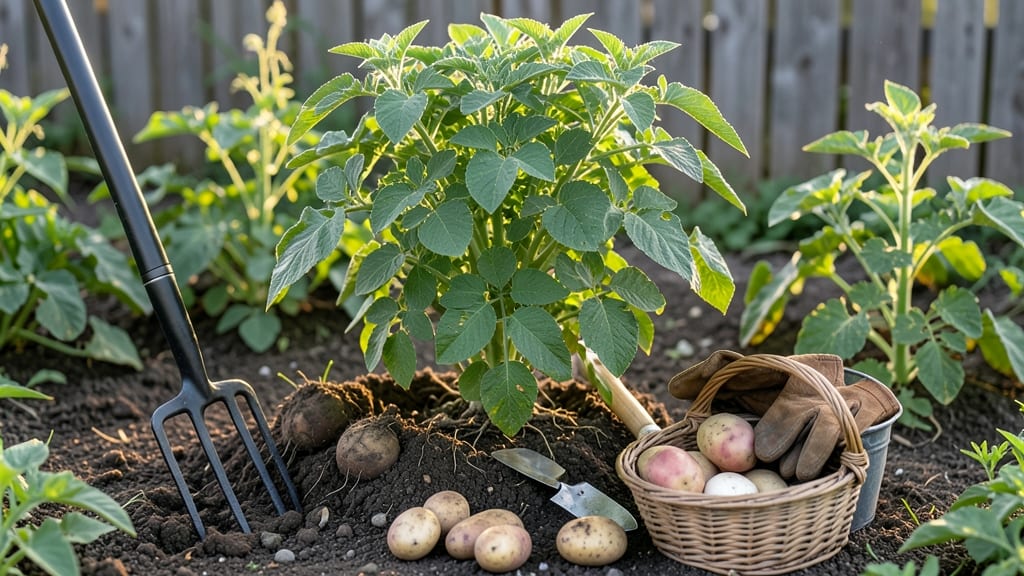
Harvesting potatoes from your garden at the right time means the difference between crisp, buttery spuds and tough, shriveled messes.
Picture this: you’ve spent weeks tending to your 🥔 plants, and now the question looms—when do you dig? Too early, and you’ll end up with small, mealy tubers. Too late, and you risk splitting or disease. The key is catching them at peak flavor, but how?
Most gardeners wait until the foliage yellows and dies back, but there are four hands-on tests that take the guesswork out of timing. From checking tuber size to probing the soil, these methods ensure you harvest at the perfect moment—no more wasted effort or disappointing results.
Whether you’re growing new potatoes for quick meals or storage varieties for winter, this guide breaks down the exact signs to watch for, plus regional adjustments and common mistakes that ruin harvests. Ready to dig up perfect potatoes?
4 Hands-on tests to determine perfect potato harvest time
Knowing when to harvest potatoes from your garden can feel like guessing—until you learn these four foolproof tests. Each method gives you a clear signal, whether it's the color of your leaves, the size of tubers, or even the behavior of your flowers.
I’ve tested these in my own garden, and they’ve never failed me. The key is combining these tests for the most accurate timing, especially since potato varieties mature at different rates.
Start by observing your potato plants daily for these visual cues. The leaf inspection test is the most reliable for most gardeners, while the soil probing test gives you a hands-on way to check tuber development without digging up the entire plant.
For new potato varieties, the flower signaling test can be a game-changer. And if you’re growing storage potatoes, the tuber size estimation test ensures you wait long enough for full flavor and size.
Step-by-Step Potato Harvest Tests
- 1 Leaf Inspection Test: Check for yellowing foliage that begins at the bottom and works upward. When 50-75% of leaves turn yellow and die back, it’s time to harvest storage potatoes. For new potatoes, wait until the plant is fully yellowed.
- 2 Tuber Size Estimation: Gently brush away soil near the plant base. If you see 2-3 inch tubers, they’re ready for harvest. For new potatoes, harvest when they’re 1-2 inches in diameter, typically 4-6 weeks after planting.
- 3 Soil Probing Test: Use a garden fork or trowel to probe 6 inches deep near the plant base. If you find firm tubers (not loose soil), they’re ready. This works best for early and mid-season varieties like 'Yukon Gold' or 'Red Pontiac'.
- 4 Flower Signaling Test: For flowering varieties like 'Russet Burbank', watch for blooms to appear. Harvest 2-3 weeks after flowering for peak flavor. If flowers don’t appear, rely on the leaf or tuber tests instead.
For new potatoes, you can harvest as early as 4-6 weeks after planting, but they’ll be smaller. These are perfect for quick meals like salads or roasting.
If you’re growing storage potatoes, wait until the foliage fully dies back—this usually happens 90-120 days after planting, depending on your climate and variety. In my Zone 6a garden, I’ve found that late June to early July is ideal for most varieties.
One common mistake is harvesting too late, which can lead to split tubers or disease. If you see green skin on your potatoes, it’s a sign of exposure to sunlight, which makes them toxic.
Always hill soil around the base of plants to prevent this. And if your soil is too wet when probing, wait a few days—dry soil makes it easier to check tuber readiness without damaging them.
Pro tip: If you’re unsure, harvest a few tubers as a test. Dig up one or two from different parts of the plant. If they’re small or mealy, give them another 1-2 weeks.
If they’re firm and flavorful, it’s time to harvest the rest. This spot-checking method saves you from guessing and ensures you get the best-tasting potatoes.
Remember, regional climate plays a big role. In cooler climates, potatoes may mature faster, while warmer regions might need a longer growing season. Always adjust your harvest timeline based on your local last frost date and average temperatures.
For example, in Southern states, you might start harvesting as early as May, while in Northern gardens, July or August could be more typical.
Once you’ve mastered these four tests, you’ll never second-guess your potato harvest timing again. The best part? You’ll end up with crisp, flavorful tubers that store well or cook up perfectly in your favorite dishes. Happy digging!
Best harvest times by potato variety and growing conditions
Not all potatoes ripen at the same time—variety and climate play huge roles in determining the perfect harvest window. Early-season varieties like 'Red Norland' mature in just 70-80 days, while late-season types such as 'Russet Burbank' need 100-120 days.
Even within the same variety, cool mountain regions may delay maturity by 2-3 weeks compared to warm coastal areas.
Soil type also affects readiness—sandy soils dry out faster, often signaling harvest earlier, while clay-heavy soils keep tubers moist longer. Loamy soil, the gold standard, balances moisture retention and drainage, giving you the most predictable harvest timing.
Always check for foliage yellowing and tuber firmness as your final cues, regardless of variety or soil.
For new potatoes, timing is all about size—aim for 2-3 inches in diameter when you see small tubers forming near the soil surface.
These varieties can be harvested 45-60 days after planting, but check weekly starting at day 40. Mature potatoes, however, should wait until the foliage fully yellows and dies back, signaling the plant has redirected all energy to the tubers.
If you're in a warm climate like Zone 9-10, potatoes may mature 2-4 weeks earlier than the variety's listed days. In contrast, cool mountain regions (Zone 3-5) often need 10-15 extra days to reach full maturity.
Always adjust your harvest calendar based on local frost dates—never let potatoes sit in the ground after the first frost, as this causes rot and splitting.
Soil type also dictates harvest readiness—sandy soils dry out quickly, often triggering earlier harvests, while clay soils keep tubers moist longer.
If your soil feels damp and cool, delay harvesting until the ground warms slightly. Loamy soil is ideal because it strikes the perfect balance, making harvest timing more predictable.
Pro tip: Keep a harvest journal to track your local conditions. Note when you planted, when foliage yellowed, and when tubers were ready. Over time, you'll spot patterns that help you predict harvest times with near-perfect accuracy—no guesswork required! 🌱