
Picking
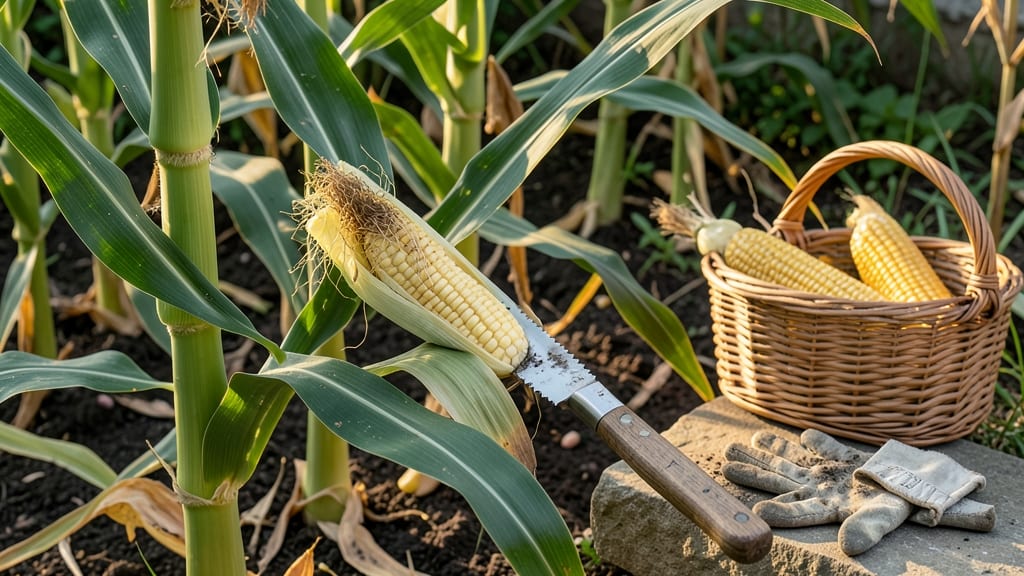
To pick corn from your garden at the perfect moment means catching it when the kernels are creamy and sweet, not starchy or woody 🌽—and the kernel milk test is the foolproof way to tell.
There’s nothing worse than biting into corn only to discover it’s still too starchy—or worse, already gone woody. Timing your harvest perfectly ensures sweet, tender kernels every time, and the kernel milk test is your secret weapon.
This simple trick works whether you’re in the heat of summer or the cooler days of early fall, and it beats guessing by days. Below, I’ll show you how to read the silks, squeeze the kernels, and adjust for your climate—so you never miss peak sweetness again.
From morning harvests to regional tweaks, you’ll learn the exact cues to look for and how to keep your corn tasting fresh long after you pull it from the soil.
How to use the kernel milk test for perfectly sweet corn
Sweet corn reaches its peak sweetness at a precise moment—when the kernels are in the milk stage. This is the golden window where sugars convert from starch, creating that buttery, juicy texture we all love.
The kernel milk test is a foolproof way to determine ripeness without guessing by days or relying on silks alone. Unlike counting days from planting (which varies by variety), this tactile method gives you an instant answer.
The test works because corn kernels contain natural sugars and starches that change as they mature. When ripe, the liquid inside the kernel—called "milk"—turns a creamy white color. Before this stage, the kernels are starchy and underdeveloped; after, they convert to woody fibers.
This method beats the traditional "silk browning" rule because silks can dry out while the ear remains underripe.
To perform the test, you’ll need just one ear of corn and your fingers. Start by selecting an ear that’s 4–6 inches long and feels plump when squeezed gently. Avoid ears with dry or shriveled tips, as these are often past their prime.
The kernel milk test is most accurate when done in the morning hours, when sugar levels are highest.
Step-by-Step Kernel Milk Test
- Step 1: Pick an ear that’s 4–6 inches long with brown, dry silks.
- Step 2: Gently squeeze the ear to check for plumpness. It should feel firm but not hard.
- Step 3: Remove the husks and silks to expose the kernels.
- Step 4: Squeeze a kernel between your thumb and forefinger. Look for a milky white liquid to ooze out.
-
Step 5: If the liquid is:
- Clear or pale yellow → Not ripe (still starchy).
- Creamy white → Perfectly ripe (harvest now!).
- Milky but turning translucent → Overripe (kernels may be tough).
The science behind the test lies in starch-to-sugar conversion. As corn matures, enzymes break down starches into simpler sugars, creating that sweet flavor. The milky liquid you see is a mix of these sugars and water.
When the liquid turns creamy white, it means the conversion is at its peak—typically 12–24 hours before the kernels start converting to tough fibers. This window is why the kernel milk test is more reliable than counting days after silking.
For early-maturing varieties (like 'Silver Queen' or 'Peaches and Cream'), test ears at 60–70 days after planting. For late varieties (such as 'Ambrosia' or 'Bodacious'), wait until 75–90 days.
Pro tip: If you’re growing multiple varieties, label your plants and test a few ears from each batch to avoid missing the sweet spot. Remember, corn continues to ripen off the plant, but the sugar content drops rapidly after harvest.
One common mistake is testing ears that are unevenly ripened. If some kernels are creamy while others are still clear, the ear isn’t ready. In this case, wait 1–2 days and retest. Another pitfall is assuming all corn is ripe just because the silks are brown.
Silks dry out 2–3 days before the kernels reach peak sweetness, so always combine the silk check with the kernel milk test for accuracy.
Once you’ve confirmed ripeness with the kernel milk test, harvest your corn immediately for the best flavor. Use a sharp knife to cut the ear about ½ inch below the base, or twist gently to avoid damaging the stalk.
Store harvested ears in the refrigerator (not the freezer) for up to 1 week to preserve sweetness. For long-term storage, blanch and freeze the kernels within 24 hours of picking.
Why does this method work better than guessing? Because it accounts for environmental factors like temperature, soil moisture, and sunlight that can speed up or slow down ripening. For example, hot, dry weather can cause corn to mature faster, while cool, cloudy conditions may delay ripening.
The kernel milk test adapts to these variables, giving you a real-time answer every time.
Pro gardeners swear by this test because it eliminates the guesswork. My own garden proved it last summer when I used the kernel milk test on my 'Honey & Pearl' corn.
The first batch I tested by silks alone turned out starchy, but the second batch—tested with the milk method—was perfectly sweet and earned rave reviews from my family. Now, I rely on it every harvest season.
Best time of day and weather conditions for picking corn
Timing your corn harvest isn't just about checking the calendar—it's about reading the weather patterns and daily rhythms of your garden. I've learned that morning harvests consistently deliver the sweetest corn because the sugar content peaks after a cool night.
The ideal temperature range for picking is between 60°F and 75°F, when kernels are most tender and flavorful.
Humidity plays a sneaky role too. High humidity before harvest can dilute that sweetness, while drought stress makes kernels tough and starchy. I always check the weather forecast for dry, breezy mornings—these conditions preserve the natural sweetness and make the husks easier to remove.
The key is balance: enough moisture during growth, but dry conditions at harvest time.
Here's where things get interesting: the ear size doesn't always match the kernel development stage. A 6-inch ear might be perfect, while a slightly smaller one could be more mature.
That's why I rely on both visual cues and the kernel milk test to make the final call. Let's break down how these factors compare:
| Factor | Morning Harvest | Evening Harvest |
|---|---|---|
| Time of Day | 6-9 AM | 4-7 PM |
| Temperature Range | 60°F-75°F | 75°F-85°F |
| Humidity Impact | Lower (better sweetness) | Higher (dilutes flavor) |
| Kernel Sweetness | Peak (natural sugars) | Declining (starch conversion) |
| Ear Size vs. Maturity | 4-6" (often ready) | 6-8" (may be overripe) |
| Weather Warning | Dry conditions ideal | Rain before harvest = tough kernels |
I've noticed that southern climates often require earlier morning harvests because the heat builds faster, while northern gardens can sometimes harvest slightly later in the morning. The kernel milk test becomes even more critical in these cases.
For example, in my Zone 6a garden, I might harvest as early as 5 AM during heatwaves to preserve that peak sweetness.
One common mistake I see is waiting until the ears are too large. While a 6-inch ear is often ideal, the kernel development stage matters more than size. The milk stage—when kernels ooze a milky liquid when pierced—is the sweet spot.
If you wait too long, those kernels convert starches into sugars and then into woody fibers, ruining the texture. I always recommend harvesting when 75% of kernels pass the milk test.
After harvesting, I've found that storing corn properly extends its freshness. Wrap ears in damp paper towels and refrigerate them for up to a week, or blanch and freeze for long-term storage.
The post-harvest care starts with that first morning pick—because once you cut the stalk, the clock starts ticking on that sweet flavor. Don't let all your hard work go to waste by waiting too long!