
Planting
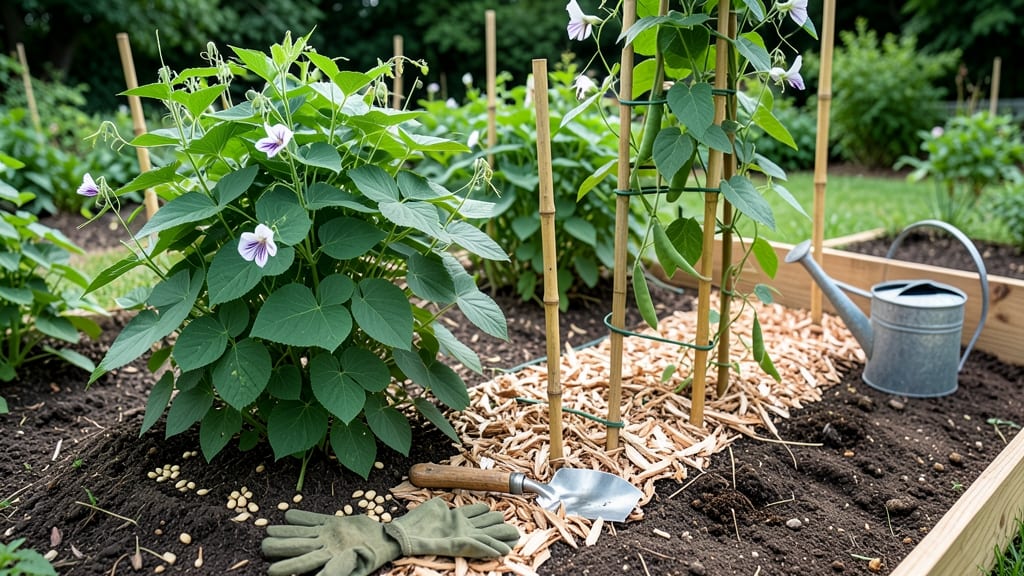
Planting green beans in your garden is easier than you think, and the right spacing tricks can turn a small patch into a bountiful harvest.
Picture this: you’ve waited all spring for the last frost to pass, and now your soil is finally warm enough to plant. But if you crowd those seeds like most beginners do, you’ll end up with tangled vines, stunted growth, or—worst of all—beans that never fully mature.
I’ve made that mistake, and trust me, you don’t want to repeat it.
Green beans thrive when given the right conditions, whether you’re growing bush varieties for quick harvests or pole beans that climb and produce for weeks.
The key is understanding how much space each type needs—bush beans want room to sprawl, while pole beans need a trellis to reach their full potential. With the right spacing, you’ll maximize your yield without wasting garden real estate.
In this guide, I’ll walk you through everything from soil prep to planting depth, spacing tips for both bush and pole beans, and even how to avoid common pitfalls that ruin harvests.
By the end, you’ll know exactly how to plant green beans for a garden full of crisp, flavorful pods all summer long.


Step-by-step guide to planting green beans in your garden
Green beans are a gardener’s dream because they’re fast-growing and low-maintenance, but success starts with proper planting. Whether you’re growing bush beans for compact harvests or pole beans for vertical space, following these steps ensures healthy plants and a bountiful yield.
I’ve planted both varieties for years, and I’ll share my go-to techniques to help you avoid common pitfalls like poor germination or tangled vines.
Before you even think about seeds, check your last frost date—green beans thrive in warm soil and won’t tolerate cold. In most regions, aim to plant after April 15, when soil temperatures consistently stay above 60°F (15°C).
If you’re in a cooler climate, consider starting seeds indoors 2-3 weeks before the last frost to give them a head start. I’ve had the best luck with direct sowing outdoors, but seedlings work too if you’re impatient!
How to Plant Green Beans: Step-by-Step
- Step 1: Prepare the Soil Choose a sunny spot with 6-8 hours of sunlight and well-draining soil. Green beans prefer loamy soil with a pH of 6.0-7.0. Work in 2-3 inches of compost or aged manure to enrich the soil and improve drainage.
- Step 2: Decide on Variety and Layout For bush beans, plant seeds 1 inch deep and 4-6 inches apart in rows 18-24 inches apart. For pole beans, plant seeds 1 inch deep and 4-6 inches apart near a trellis or stakes, spacing rows 12-18 inches apart.
- Step 3: Plant Seeds Correctly Drop 2-3 seeds per hole (you can thin later) at the 1-inch depth. Space seeds as described above. If planting in cool soil, use a seed starter or cover with a lightweight row cover to warm the soil faster.
- Step 4: Water Gently Water the soil thoroughly after planting to settle seeds. Keep soil consistently moist (not soggy) until germination, which takes 7-14 days. Avoid wetting the leaves to prevent disease.
- Step 5: Thin Seedlings Once seedlings reach 2 inches tall, thin to 1-2 strong plants per spot. Snip weaker seedlings at the base with scissors to avoid disturbing roots. For pole beans, guide the remaining plants toward your trellis or stakes as they grow.
- Step 6: Add Support for Pole Beans If growing pole beans, install 5-6 foot trellises or stakes before vines climb. Use soft ties or twine to gently attach vines to supports. This saves space and keeps pods off the ground, reducing pests and disease.
- Step 7: Mulch and Fertilize Lightly Apply 2-3 inches of mulch (straw or grass clippings) to retain moisture and suppress weeds. Fertilize lightly with a balanced 10-10-10 fertilizer at planting and again when flowers appear. Avoid heavy feeding, as it can reduce pod production.
One of the biggest mistakes I see is overcrowding seeds, which leads to weak, tangled plants. Stick to the spacing guidelines, and don’t be tempted to plant extra seeds—thinning is crucial for healthy growth.
For pole beans, I recommend using a strong trellis system early on. A simple DIY trellis made from bamboo stakes and twine works wonders and saves space in small gardens.
After planting, monitor your soil moisture closely. Green beans need consistent watering, especially during flowering and pod development. I water mine deeply every 3-5 days, aiming for 1-2 inches of water per week.
Early morning watering is best—it reduces evaporation and fungal risks. If your soil feels dry 1 inch below the surface, it’s time to water again.
Within 45-55 days, you’ll start seeing those first pods form. That’s when the real fun begins! Harvest regularly to encourage more production, and watch your plants thrive.
If you’re growing bush beans, you might get multiple harvests over 2-3 weeks, while pole beans can produce for 6-8 weeks if cared for properly.
Pro tip: If you’re in a warm climate, you can plant a second crop in late summer for a fall harvest. Just make sure to choose heat-tolerant varieties like ‘Contender’ or ‘Blue Lake.’ I’ve had great success with this trick, and it extends my fresh bean supply well into autumn.
🌱
Optimal spacing for bush vs. pole green beans: avoid these common mistakes
Green beans thrive when planted with the right spacing, but many gardeners make the same mistakes—whether it's crowding bush beans or failing to support pole beans properly. The key difference lies in their growth habits: bush beans spread outward while pole beans climb vertically.
Getting this wrong can lead to stunted plants, poor airflow, and even disease. Let’s break down the science behind spacing to maximize your harvest.
For bush beans, the golden rule is 18-24 inches apart in rows spaced 2-3 feet apart. This gives each plant enough room to develop a full bush structure without competing for nutrients.
Skimping on space means plants will fight for sunlight and water, resulting in smaller yields and leggy stems. Meanwhile, pole beans need a completely different approach—plant them 4-6 inches apart but provide a sturdy trellis or cage for vertical growth.
Overcrowding is the #1 mistake I see in home gardens. When bush beans are planted too closely, they develop weak stems and become prone to fungal diseases like rust or powdery mildew. The same goes for pole beans: without proper spacing, their vines tangle, making harvests messy and increasing pest risks. Think of spacing as an investment in your plants’ future—it’s the difference between a handful of beans and a bushel!
| Type | Spacing (inches) | Row Spacing (feet) | Trellis Needed? | Yield Impact |
|---|---|---|---|---|
| Bush Beans | 18-24" | 2-3 ft | No | Compact, high yield per plant |
| Pole Beans | 4-6" | 1-2 ft (with trellis) | Yes | Higher total yield, vertical space-saving |
If you’re working with a small garden, pole beans are your best friend. They save space by growing upward, allowing you to fit more plants in the same footprint.
For example, a 4-foot-wide raised bed can easily accommodate two rows of pole beans with proper trellising, while bush beans would only fit one row. Just ensure your trellis is at least 6 feet tall—pole beans can climb that high!
Another common mistake is planting pole beans without support from day one. If you wait until the vines are already sprawling, they’ll struggle to climb and may break under the weight of the pods. Install your trellis or cage before planting and train the vines early.
I like using T-posts with twine for simple setups or pre-made cages for convenience. Proper support also improves airflow, reducing the risk of diseases like bean mosaic virus.
For maximum yield in limited space, try interplanting bush and pole beans. For instance, plant a row of bush beans along the edge of your garden, then use the center for pole beans on a trellis.
This way, you get the benefits of both: quick harvests from bush beans and extended production from pole beans. Just monitor moisture levels closely—pole beans on trellises dry out faster than bush varieties.