
Container Gardens
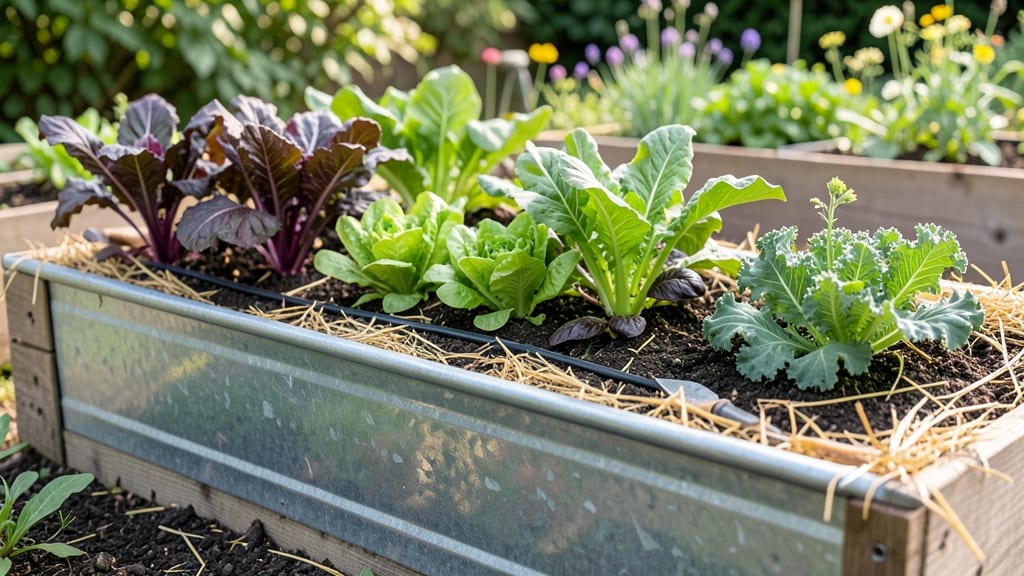
Repurposing water troughs into raised garden beds is a brilliant way to create stylish, space-saving planters that require no digging.
Transforming old water troughs into functional raised garden beds is a genius way to maximize small spaces while adding rustic charm to your yard—no digging required!
These unique containers hold moisture better than traditional raised beds, making them ideal for herbs, succulents, and shallow-rooted vegetables in USDA Zone 6a.
Below, I’ll share 5 creative layouts, step-by-step conversion tips, and the best plants to grow in your new trough garden—plus how to keep them thriving all season long.
How to convert water troughs into functional raised garden beds
Repurposing old water troughs into raised garden beds is one of my favorite DIY gardening projects—it’s budget-friendly, eco-conscious, and perfect for small spaces. These sturdy containers naturally hold moisture, making them ideal for drought-tolerant plants like herbs, strawberries, or succulents.
Plus, their rustic look adds instant charm to any yard. The key is transforming their original purpose (holding water) into a thriving planting environment without compromising structural integrity.
Before you start, gather your materials: a clean, food-grade plastic or metal trough, landscape fabric, potting soil, drainage holes (if needed), and optional supports like bricks or cinder blocks. If your trough lacks drainage, don’t worry—we’ll cover solutions to prevent root rot.
The process is simpler than you think, and I’ll walk you through every step to ensure your trough beds last for years.
Step-by-Step Guide to Repurposing Water Troughs
- 1 Clean and Sanitize: Scrub the trough with a 10% vinegar solution to remove dirt, algae, or residue. Rinse thoroughly and let it dry in the sun for 24 hours to kill bacteria.
- 2 Add Drainage: Drill ¼-inch holes in the bottom if absent, or place a 2-inch layer of gravel or broken pottery at the base. Cover with landscape fabric to prevent soil from clogging drainage.
- 3 Layer Soil: Fill the trough with a mix of 60% potting soil, 30% compost, and 10% perlite for aeration. Avoid garden soil—it compacts and blocks drainage.
- 4 Reinforce Structure: For metal troughs, add wooden slats underneath to prevent warping. For plastic troughs, place them on bricks or pallets to elevate them 6 inches off the ground for airflow.
- 5 Plant Strategically: Choose shallow-rooted plants like strawberries, lettuce, or herbs. Space them 6–12 inches apart to avoid competition. Water thoroughly after planting to settle the soil.
- 6 Mulch and Maintain: Top with 1 inch of mulch (straw or shredded leaves) to retain moisture. Water deeply 2–3 times a week, and fertilize with a balanced 10-10-10 mix every 6 weeks.
One of the biggest mistakes I see is skipping the drainage layer. Without it, water pools at the bottom, leading to root rot and mold. If your trough lacks holes, elevate it on cinder blocks or bricks to allow excess water to drain away naturally.
For extra stability, especially with metal troughs, consider adding corner braces or securing them to a wooden frame.
For long-term success, rotate your plants annually to prevent soil depletion. Troughs are shallow, so avoid deep-rooted veggies like carrots or potatoes—they’ll struggle. Instead, opt for herbs, leafy greens, or compact flowers that thrive in confined spaces.
My favorite trough combo? Basil, thyme, and cherry tomatoes—they complement each other and look stunning together.
Pro tip: If your trough has a dark interior, it absorbs heat, which can scorch plants in hot climates. Paint the inside with white latex paint to reflect sunlight and keep roots cooler.
This trick works wonders in Zone 8 and above, where summer temps can soar. Just ensure the paint is non-toxic and food-safe before planting.
Finally, don’t overlook the aesthetic potential of your trough beds. Stack them vertically for small spaces, or line them along a fence for a rustic border. Add solar-powered lights or hanging planters nearby to create a cohesive garden nook.
With a little creativity, your repurposed troughs will become the star of your outdoor space—both functional and fabulous.
Ready to get started? Grab that old trough gathering dust in your shed and turn it into a thriving garden in just a weekend. Your plants—and your wallet—will thank you!
5 Space-saving water trough garden bed layouts for small yards
Small yards don’t mean small gardens! Repurposing water troughs into raised beds is a brilliant way to grow more in less space. These rustic containers can be stacked, tiered, or arranged vertically to create functional and stylish garden layouts without sacrificing your lawn.
The key is maximizing vertical space while ensuring each plant gets the sunlight and drainage it needs. Whether you have a sunny patio or a shady corner, these layouts will help you grow lush herbs, veggies, or flowers—even in tight spaces.
One of my favorite layouts is the vertical stacking system, where I place two or three troughs on top of each other using sturdy brackets or cinder blocks. This setup is perfect for herbs like basil and thyme, which thrive in shallow soil and don’t need deep roots.
The top trough gets the most sun exposure, while the bottom one stays cooler—ideal for leafy greens like lettuce or spinach. Just make sure to drill drainage holes in the bottom of each trough to prevent waterlogging.
For corner spaces, a single trough mounted diagonally against a fence or wall creates a striking focal point. I often fill this with trailing plants like nasturtiums or strawberries, which spill over the edges beautifully.
This layout is especially useful if you’re working with an L-shaped patio or a narrow alleyway. Add a small drip irrigation system to make watering effortless, and you’ll have a low-maintenance, high-impact garden feature that’s easy to access.
🌱 Water Trough Layout Comparison
| Layout Type | Best For | Space Needs | Sunlight Needs | Drainage Tips |
|---|---|---|---|---|
| Vertical Stacking | Herbs, shallow-rooted veggies | Tight spaces (3-4 ft wide) | Full sun (top) to partial (bottom) | Drill holes in each trough |
| Tiered Design | Succulents, strawberries | Balconies, decks (2-3 ft wide) | Full sun to partial shade | Elevate on bricks or stands |
| Corner Mount | Trailing plants, flowers | Narrow corners (2-3 ft) | Partial shade to full sun | Angle for runoff |
| Multi-Level Wall | Vegetables, herbs | Vertical walls (3-5 ft tall) | Full sun (south-facing) | Use drip irrigation |
| Freestanding Pair | Companion plants | Open areas (4-5 ft apart) | Full sun | Add gravel base |
A tiered design is another space-saving winner, especially for balconies or decks. I place three troughs at descending heights using metal stands or cinder blocks, creating a cascading effect.
The top trough holds sun-loving succulents like sedum, while the middle and bottom troughs can accommodate strawberries or lettuce, which prefer cooler roots. This setup not only saves space but also adds visual interest to your outdoor area.
Just remember to rotate the troughs occasionally to ensure even sunlight exposure.
If you’re working with a sunny wall, a multi-level trough arrangement can transform it into a vertical garden oasis. I’ve seen stunning setups where three troughs are mounted at different heights, creating a living tapestry of greenery.
This layout is perfect for tomatoes, peppers, or herbs like rosemary, which love warmth and good airflow. Use L-brackets or heavy-duty hooks to secure the troughs, and don’t forget to water from the top to ensure even moisture distribution down the levels.
For a freestanding duo, place two troughs side by side to create a companion planting system. I often pair basil with tomatoes