
Tools
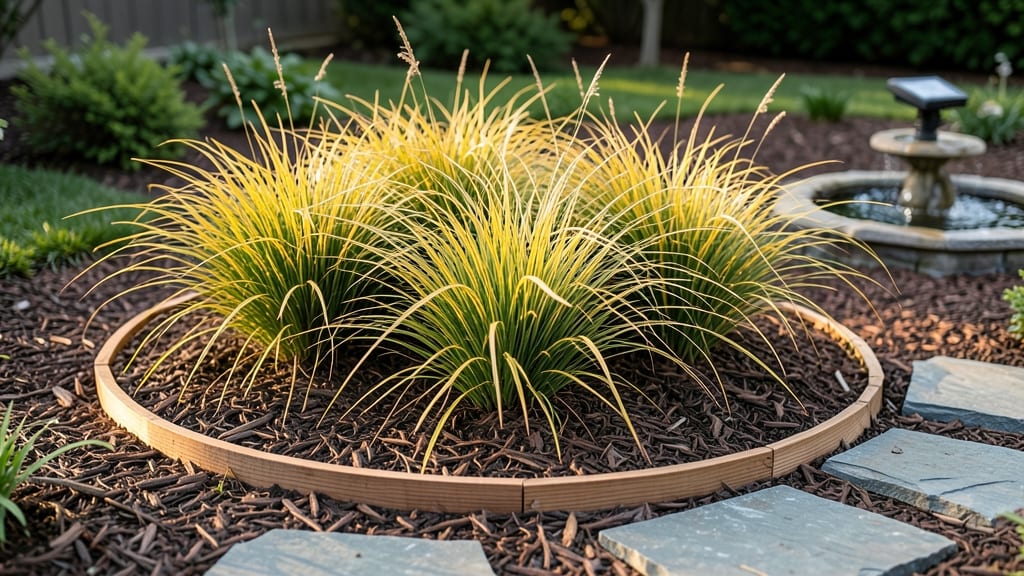
Creating mound garden bed ideas that last all season is easier than you think—these tiered, elevated designs solve drainage issues while adding height and drama to any yard.
Picture this: no more soggy roots or wasted space. Instead, you have a thriving garden that’s easier to tend, looks stunning year-round, and even extends your growing season. That’s the magic of mound beds.
From drought-resistant perennials to lush vegetables, the right plants and materials can turn your mound into a low-maintenance showstopper. Whether you’re working with limited space or just want a fresh look, these designs adapt to any style—cottage charm, modern minimalism, or a pollinator paradise.
Below, I’ll walk you through step-by-step construction, plant pairings for every light condition, and creative shapes that make your garden the envy of the neighborhood. Ready to transform your yard?
How to build a mound garden bed for optimal drainage & plant health
Mound garden beds solve two common gardening challenges: poor drainage and limited space. By elevating your planting area, you create a self-draining system that prevents root rot while offering accessibility for gardeners with mobility issues.
These beds also warm up faster in spring, giving you an earlier start to your growing season. Whether you're working with clay soil or a small urban yard, mound beds transform underutilized spaces into thriving gardens.
Before breaking ground, choose a location with at least 6 hours of sunlight daily. Avoid areas with tree roots or underground utilities. For optimal airflow, position your mound bed near a fence or wall to catch breezes.
The key to longevity lies in the soil composition—you'll need a mix of native soil, compost, and coarse materials like perlite or gravel to prevent compaction. Let's build one that lasts for years with minimal maintenance.
🌱 Step-by-Step Mound Garden Bed Construction
- 1 Mark Your Layout: Use stakes and string to outline a 3-4 foot diameter circle or 4x6 foot rectangle. For slopes, create a gentle 5-10° angle to prevent erosion.
- 2 Remove Sod: Cut a 6-inch deep trench around your outline. Remove all grass and weeds, then loosen the soil with a broadfork or shovel to 12 inches deep.
- 3 Layer for Drainage: Start with 4-6 inches of coarse material—gravel, broken bricks, or hardwood chips—to create a drainage layer. This prevents water from pooling at the base.
- 4 Build the Mound: Pile native soil mixed with 30% compost to create a 12-18 inch tall mound. Shape it with a slight slope (1 inch drop per foot) for stability. For wooden edging, use cedar planks or stone borders to contain the soil.
- 5 Add Topsoil: Spread 4-6 inches of high-quality topsoil enriched with worm castings or aged manure. This top layer should be loose and crumbly to encourage root growth.
- 6 Mulch & Protect: Top with 3-4 inches of mulch—straw, pine needles, or shredded bark—to retain moisture and suppress weeds. For windy areas, add landscape fabric around the base to secure the mound.
For extra stability, especially in clay-heavy soils, reinforce the mound with horizontal layers of landscape fabric between soil layers. This prevents erosion and keeps the structure intact during heavy rains.
If you're building a multi-tiered mound, space each level 12-18 inches apart to allow for easy access and proper drainage between tiers. My largest mound bed features three terraced levels, each planted with different sunlight-loving perennials for a cascading effect.
When selecting edging materials, consider durability and aesthetics. Cedar planks resist rot and add a rustic charm, while fieldstone borders create a natural, timeless look. For low-maintenance options, use brick or concrete pavers—just ensure they're perforated to allow water drainage.
Avoid plastic edging, as it can trap moisture and cause rot over time. Pro tip: Paint or stain wood edging before installation to extend its lifespan by 3-5 years in harsh climates.
After construction, water thoroughly to settle the soil and encourage root growth. For the first two weeks, check the moisture level daily—mound beds dry out faster than ground-level gardens. To test drainage, pour 1 gallon of water on the mound and time how long it takes to drain.
If water pools for more than 30 minutes, add another 2 inches of gravel to the drainage layer. This simple test saves your plants from root suffocation in the long run.
Maintenance is minimal but critical. Replenish mulch annually to maintain moisture and suppress weeds. Every spring, top-dress with 1-2 inches of compost to replenish nutrients. For long-term health, rotate plants annually to prevent soil depletion.
My herb mound thrives because I swap out annual herbs like basil and cilantro with perennial favorites like rosemary and thyme each season. This keeps the soil balanced and the harvest abundant.
For winter protection, add an extra 4-6 inches of mulch before the first frost. This insulates the soil and protects roots from freeze-thaw cycles. In USDA Zone 5 and colder, consider covering the mound with burlap or frost cloth during extreme cold snaps.
Even in mild climates, winter mulching prevents soil erosion and keeps your mound ready for spring planting. With proper care, your mound garden bed will outlast traditional in-ground beds by decades.
Don't let the elevated height intimidate you—mound beds are surprisingly accessible. The gentle slope makes weeding and harvesting easier, and the tiered design maximizes space for small gardens. I built a circular mound in my backyard that now serves as a pollinator paradise, attracting bees and butterflies year-round.
Whether you're growing vegetables, flowers, or herbs, mound beds offer a low-stress, high-reward gardening solution that works for any skill level.
Ready to transform your garden? Start small with a 3-foot diameter mound to test your design. Once you master the basics, experiment with spiral shapes, keyhole designs, or even a mini "hillside" in your yard.
The possibilities are endless—and your plants will thank you for the perfect growing conditions! 🌿
Best plants for mound garden beds by sunlight & seasonal needs
Mound garden beds thrive when planted with the right species that match their unique conditions—elevated soil, excellent drainage, and full sun exposure. The key is selecting plants that handle these conditions while providing year-round interest, from spring blooms to winter structure.
For full sun areas, focus on drought-tolerant perennials and heat-loving annuals, while partial shade spots can feature shade-adapted plants like ferns and hostas.
My go-to strategy? Tiered planting—place taller plants like roses or hollyhocks at the back of the mound, medium-height perennials like coneflowers in the middle, and spiller plants such as creeping thyme or ajuga at the edges.
This creates a dynamic, layered look while ensuring every plant gets the sunlight it needs.
| Plant Type | Sun Needs | Water Needs | Mature Size | Seasonal Interest |
|---|---|---|---|---|
| Lavender | Full Sun | Low | 2-3 ft tall | Spring-Summer blooms, winter structure |
| Coneflowers | Full Sun-Part Sun | Medium | 2-4 ft tall | Summer-Fall blooms, winter seed heads |
| Creeping Thyme | Full Sun | Low | 3-6 in tall | Spring-Summer flowers, year-round ground cover |
| Russian Sage | Full Sun | Low-Medium | 3-5 ft tall | Summer-Fall blooms, winter stems |
| Heuchera | Partial Shade | Medium | 1-2 ft tall | Year-round foliage, spring blooms |
For edible crops, mound beds are perfect for tomatoes, peppers, and strawberries—they thrive in the warmth and airflow while staying disease-free. Plant strawberries at the edges for easy harvesting, while tomatoes can climb small trellises placed along the mound’s slope.
In partial shade, lettuce, spinach, and chives do exceptionally well, especially in hotter climates where they’d otherwise bolt.
Don’t overlook winter interest! Evergreen plants like boxwood, junipers, or ornamental grasses add structure when other plants fade. Pair them with late-blooming perennials like sedum or astors to keep color until frost. Mulch heavily in fall to insulate roots and reduce watering needs in spring.
Pro tip: Group plants with similar water needs together to simplify maintenance. For example, lavender and rosemary (both drought-tolerant) can share space at the top of the mound, while hostas and ferns (needing more moisture) thrive at the base.
This zonal approach keeps your mound bed low-maintenance and lush all season.
Ready to transform your mound bed into a year-round showstopper? Start with 3-5 plants from the table above, then expand based on your sunlight and space. The key is layering for height, texture, and color—just like a well-designed stage!